Exporting to Tableau Server
Monarch Classic supports exports to and updates of existing worksheets in Tableau Server. Access to Tableau Server may be configured through the Security tab of the Options window.
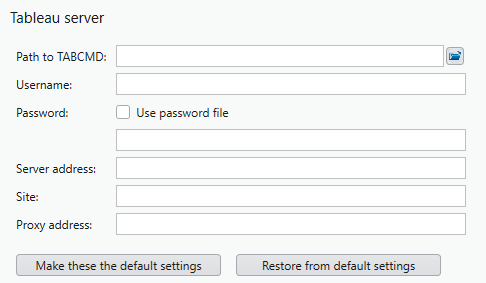
The following items must be supplied to establish a connection to Tableau Server.
|
Field |
Description |
|
Path to TABCMD |
The folder in which TABCMD, a command line utility supplied by Tableau that performs various operations in Tableau Server, is installed. Note: This utility must be installed to access Tableau Server. The path to this file can only be configured through the Security tab of the Options window. |
|
Username |
The username of the person accessing Tableau Server. |
|
Password |
The password of this user. If the Use password file option is selected, you must specify the path to your password file. |
|
Server address |
The URL of Tableau Server.
|
|
Site |
The site to be accessed in Tableau Server. If the server has multiple sites and you are logging in to a site other than the default site, the target site must be identified. This setting is optional. |
|
Proxy Address |
The IP (host:port) of your proxy server if you are using one. This setting is optional. |
-
Create an export via Export Design and select Tableau Hyper as the export file type.
-
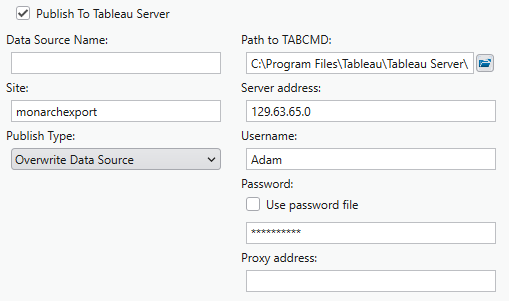
Check the box for Publish to Tableau Server.
-
The information you entered to access Tableau Server in the Security tab of the Options window displays. If you did not provide the necessary information in this tab, you can do so now.
-
Enter a data source name into the field provided and select a publish type.
-
Overwrite Data Source - This option will erase the existing data source and replace it with a new one containing the newly exported data.
-
Replace Data - This option will erase all previous data in the data source and replace it with the newly exported data.
-
Append Data - This option will append the newly exported data to the data in the existing data source.
-
-
Select Accept when you are finished to close Export Design view and add your newly defined export to the Export selector in Export view.
-
Run the export as usual.
© 2024 Altair Engineering Inc. All Rights Reserved.