Export and Data Check
Before exporting a model, the setup can be verified and checked for errors using the Data Check tool.
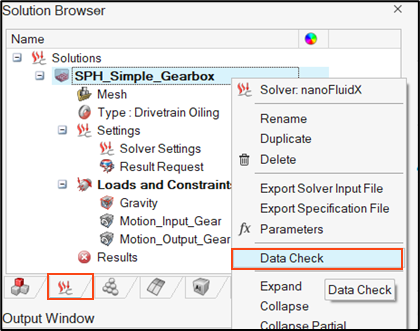
Verify the model using Data Check
- Access Data Check from the Solution Browser.
- Right-click the Solution Name and select Data Check.
Attention: The Data Check tool requires the Output Window to be enabled
via .
For more information on nFX[p], refer to nanoFluidX Prep.
Export Configuration and Particle Files
- To Export the model, right-click the Solution Name in the Solution Browser and select Export Solver Input File, similar to as shown in Figure 1.
- Choose to export only the configuration files (*.cfg) or both the particle (*.prtl) and configuration files.
Note: STL walls, Stencil Files for Inlet regions and Probes,
and Time History files are considered part of the Configuration file and are
exported together.
Important: Only the SPH bodies selected in the
Solution will be exported. This can be verified by double-clicking the Solution
Name and viewing the bodies in the Solution menu.