Create and View Section Cuts
Use the Section Cuts tool to cut planar or spherical sections through a model.
Create Section Cuts
-
From the View Controls toolbar, click
 .
.
-
In the Section Cuts dialog, click
 to create a
new section cut.
to create a
new section cut.
-
Click
 of the left side of the
microdialog to select either a planar or spherical
section cut.
Note: For aerodynamic/aeroacoustic setup, only section planes are available. Click the section plane preview or elsewhere on the model to create the section cut then drag to reposition.
of the left side of the
microdialog to select either a planar or spherical
section cut.
Note: For aerodynamic/aeroacoustic setup, only section planes are available. Click the section plane preview or elsewhere on the model to create the section cut then drag to reposition. -
Change the display and position of the section cut using the other microdialog options.
- Display only the section cut by clicking
 .
. - Reverse the part of the model that is hidden by clicking
 .
. - Trim elements along the plane/sphere to create a smooth section cut by
clicking
 .
. - Translate or rotate the section cut using graphical manipulators by
clicking
 . For
spherical section cuts, the yellow manipulator can be used to adjust the
radius of the sphere.Tip: You can also click and drag the frame directly. After exiting the section cut tool, these frames remain visible, allowing you to translate or rotate a section cut at any time. For planar section cuts, click and drag the center of the frame to translate. Click and drag a corner or an edge to rotate.
. For
spherical section cuts, the yellow manipulator can be used to adjust the
radius of the sphere.Tip: You can also click and drag the frame directly. After exiting the section cut tool, these frames remain visible, allowing you to translate or rotate a section cut at any time. For planar section cuts, click and drag the center of the frame to translate. Click and drag a corner or an edge to rotate. - Align the section plane to the x, y, or z-axis by clicking
 .Note: Only available for planar section cuts.
 - Reposition the section plane to the model center by
clicking
 .
.
Figure 1. Planar Section Cut 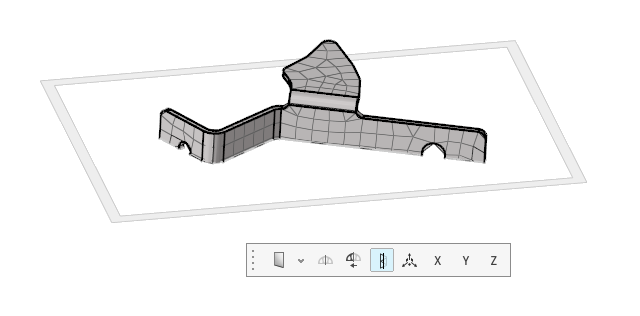
Figure 2. Spherical Section Cut 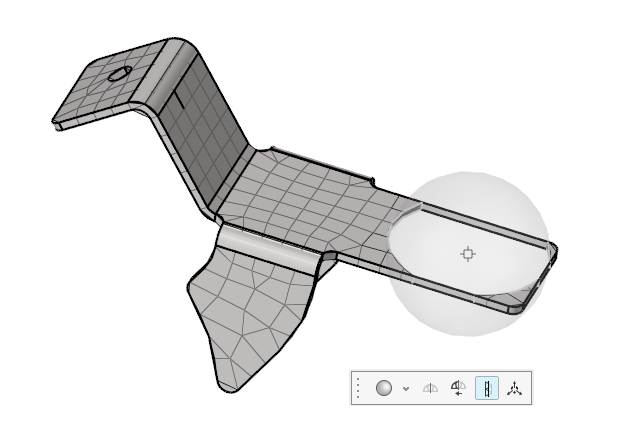
Figure 3. Aerodynamic/Aeroacoustic Section Cut 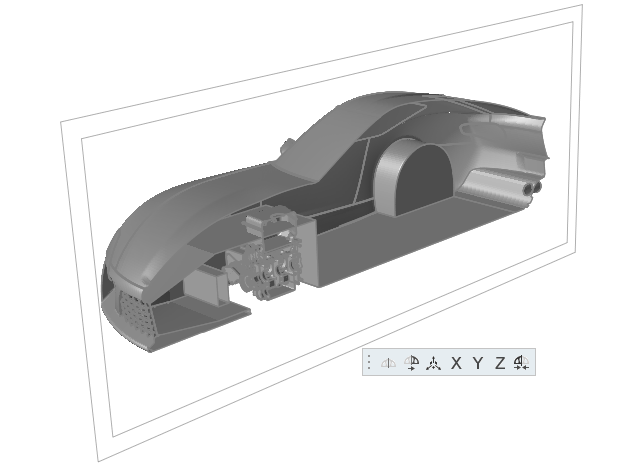
- Display only the section cut by clicking
Tip: Use the right-click context menu in the Section
Cuts/Planes dialog to edit, show/hide, and delete, section
cuts.
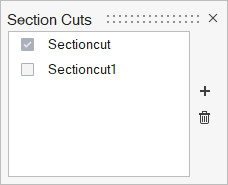
View Section Cuts
-
From the View Controls toolbar, click .
-
In the Section Cuts dialog, enable the checkboxes of the
section cuts you wish to view.
Figure 4.