Review and Edit a Measure Or Measure Group
Change the Display Options of a Measure Group
- Set the entity selector to Measures Groups, select a measure
group in the modeling window and right-click and select
Edit Measure Group... (the item with icon displayed next to it)
from the context menu.
Figure 1. 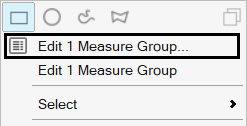
Alternatively, from the Measure table dialog, select a measure group and right-click to Edit.
This will display the Entity Editor dialog.
Note: Changing the display option is supported only for a measure group, not individual measures.Tip: You can also select the measure in the Results Browser and use the docked Entity Editor located at the bottom. - Use the Display section of the Entity Editor to change the
following:
- Select a new font type/style/size.
- Choose Measure text display options in the modeling window.
- Change color (this can also be done from the color column in the measure table or measure list in the browser).
- Change format/precision/angle of measure group.
Delete a Measure
- Set the entity selector to Measures or Measure
Groups, select a measure (or group) in the modeling window and right-click and select
Delete from the context menu.
Alternatively, from the Measure table dialog, select a measure and right-click to Delete.
Tip: You can also select the measure in the Results Browser and right-click to Delete.
Change Global Display Options
- Set the entity selector to Measure Groups, select a measure
group in the modeling window and right-click and select
Edit Measure Group... (the item with icon displayed next to it)
from the context menu.
Alternatively, from the Measure table dialog, select a measure group and right-click to Edit.
This will display the Entity Editor dialog.
Note: Changing display option is supported only for a measure group, not individual measures.Tip: You can also select the measure in the Results Browser and use the docked Entity Editor located at the bottom. - Use the Global section of the Entity Editor to change the
following:
Option Description Transparency Activate the check box to remove the color from the measure group box and make it transparent against the window. Auto-hide Activate the check box to hide the measure group box when the selected entities are not visible on the screen. Prefix Activate the check box to show the prefixes for the measure readouts (for example, "Value =").
Add New Measures to an Existing Measure Group
- Set the entity selector to Measure Groups and either
double-click on a measure group or select a measure group in the modeling window and right-click and select Edit Measure
Groups (the item without the icon) from the context menu.
Figure 2. 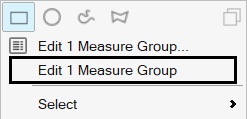
This will open the with the measure type preset to the type of the measure group (this cannot be changed). Next, using the entity selector, pick the nodes (or elements or relevant entities) and the measure is created and added to the edited measure group. Once done, click the green check mark to exit the tool.