OS-T: 1395 Acoustic Analysis of Speaker Using RADSND
This tutorial demonstrates how to perform acoustic analysis of 2.1 speakers using the RADSND Method.
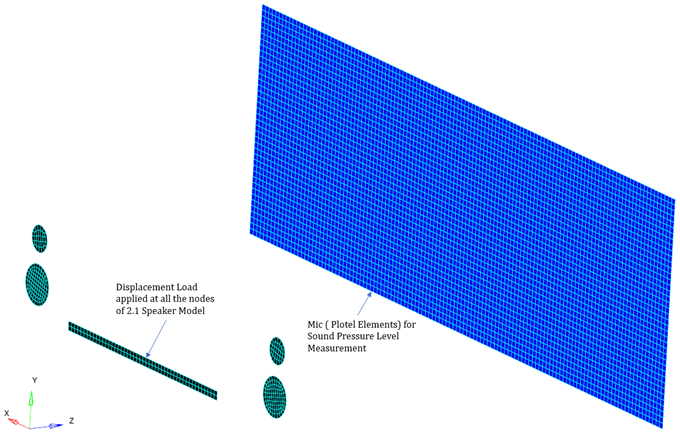
For this model, a frequency response analysis is performed to measure the sound pressure level at the mic points. In Figure 1, the 2.1 speaker is illustrated by the shell elements on which harmonic displacement is applied at each node to make them vibrate. The vibration of the speakers produces sound waves that are measured at the mic points. The results, displacements and sound pressure levels, will be reviewed in HyperView.
Launch HyperMesh and Set the OptiStruct User Profile
-
Launch HyperMesh.
The User Profile dialog appears.
-
Select OptiStruct and click
OK.
This loads the user profile. It includes the appropriate template, macro menu, and import reader, paring down the functionality of HyperMesh to what is relevant for generating models for OptiStruct.
Open the Model
- Click .
- Select the speaker_RADSND.fem file you saved to your working directory from the OptiStruct.zip file. Refer to Accessing the Model Files.
-
Click Open.
The speaker_RADSND.fem database is loaded into the current HyperMesh session, replacing any existing data.
Set Up the Model
In this step you will create the material and property, and assign the property.
Create the Material
- In the Model Browser, right-click and select from the context menu.
- For Name, enter Aluminum.
- Click Color and select a color from the color palette.
- For Card Image, select MAT1 from the drop-down menu.
- For E, enter 70E9.
- For NU, enter 0.3.
Create the Property
- In the Model Browser, right-click and select from the context menu.
- For Name, enter Shell.
- Click Color and select a color from the color palette.
- For Card Image, select PSHELL from the drop-down menu and click Yes to confirm.
- For Material, select .
- In the Select Material dialog, select Aluminum from the list of materials and click OK.
- For Thickness, enter 0.01.
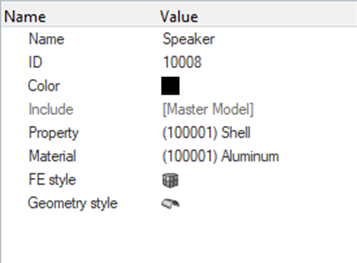
Assign the Property
Apply Loads and Boundary Conditions
In this step you will create load collectors and set boundary conditions.
Create SPC Load Collector
- In the Model Browser, right-click and select from the context menu.
- For Name, enter SPC.
- Click Color and select a color from the color palette.
- Toggle Analysis panel and select the constraints option.
- Select all nodes of the speaker and activate all DOF and enter 0 for each.
- For Load Type, select SPC and click return.
Create SPCD Load Collector
- In the Model Browser, right-click and select from the context menu.
- For Name, enter SPCD.
- Click Color and select a color from the color palette.
- Toggle Analysis panel and select the constraints option.
- Select all nodes of the speaker and activate DOF 3 and enter 1E-5.
- For Load Type, select SPCD and click return.
Create a Set of Frequencies
- In the Model Browser, right-click and select from the context menu.
- For Name, enter Freq.
- Click Color and select a color from the color palette.
- For Card Image, select FREQi from the drop-down menu.
- Check the FREQ1 option and for NUMBER_OF_FREQ1, enter 1.
-
Enter the following information:
- For F1, enter 0.0.
- For DF, enter 5.0.
- For NDF, enter 15.
-
Click Close.
This provides a set of frequencies beginning with 0.0, incremented by 5.0 and 15 frequencies.
Create a Frequency Range Curve
-
In the Model Browser, right-click and select from the context menu.
A new Curve editor window opens.
- For Name, enter tabled1.
-
In the pop-out window, enter:
- For x(1) = 0.0.
- For y(1) = 1.0.
- Fo x(2) = 100.0.
- For y(2) = 1.0.
- Click Close.
- In the Model Browser under Curves, select tabled1.
- Click Color and select a color from the color palette.
-
For Card Image, select TABLED1 from the drop-down
menu.
This provides a frequency range of 0.0 to 100.0 with a constant 1.0 over this range.
Create a Frequency Dependent Load
- In the Model Browser, right-click and select from the context menu.
- For Name, enter Rload1.
- For Config type, select Dynamic Load - Frequency Dependent from the drop-down list.
- For Type, select rolad1 from the drop-down menu.
- For EXCITEID, click .
- In the Select Loadcol dialog, select SPCD from the list of load collectors and click OK.
- For TD, select the tabled1 curve.
-
For TYPE, select DISP.
This provides a type of excitation. The type of excitation can be an applied load (force or moment), an enforced displacement, velocity or acceleration. The field type in the Rload1 load step input defines the type of load. The type is set to applied load by default.
Create a Dynamic Load
- In the Model Browser, right-click and select from the context menu.
- For Name, enter Dload.
- For Config type, select Dynamic Load Combination from the drop-down list.
- For Type, accept the default selection of DLOAD.
- For s, enter 1.
- For Dload num, enter 1.
- For S, enter 1.
- For L, select RLoad1.
Create LOADSTEP
-
In the Model Browser, right-click and select from the context menu.
A default load step template displays in the Entity Editor.
- For Name, enter DFREQ.
- For Analysis type, select Freq.resp (direct) from the drop-down menu.
- For SPC, select SPC from the Select Loadcol dialog.
- For DLOAD, select Dload from the Select LoadstepInputs dialog.
- For FREQ, select Freq from the Select Loadcol dialog.
Set Up a RADSND Panel
In this step you will create and set up a RADSND panel.
Create a Surface Nodes Set
- In the Model Browser, right-click and select from the context menu.
- For Name, enter Surface_Nodes.
- For Card Image, select SET_GRID from the drop-down menu.
- For Entity IDs, select Nodes, then select all nodes of the speaker component, and click proceed.
Create a Mic Nodes Set
- In the Model Browser, right-click and select from the context menu.
- For Name, enter Mic.
- For Card Image, select SET_GRID from the drop-down menu.
- For Entity IDs, select Nodes, then select all nodes of the receiver component, and click proceed.
Create PANELG
- In the Model Browser, right-click and select from the context menu.
- For Name, enter PANEL.
- For Card Image, select PANELG from the drop-down menu.
- For Type, select SOUND.
- For GSID, select Surface_Nodes from the list of sets.
Create RADSND
- In the Model Browser, right-click and select from the context menu.
- For Name, enter RADSND.
- For Card Image, select RADSND from the drop-down menu.
- For Entity IDs, select Mic from the list of sets.
- For RADSND_NUM_PANEL, enter 1.
- For PID, select PANEL from the list of sets.
Define Output Control Parameters
- From the Analysis page, select control cards.
- Click on GLOBAL_OUTPUT_REQUEST.
- Select DISPLACEMENT and SPL and click return.
- Click on GLOBAL_CASE_CONTROL.
- Select RADSND and select SID = RADSND from the list of sets.
-
In the control cards page PARAM, under PARAM, select
SPLC, SPLREFDB and
SPLRHO and enter the values, as shown below:
Figure 3. 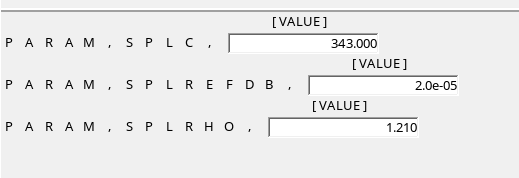
- Click Enter twice to go back to the main menu.
Submit the Job
-
From the Analysis page, click the OptiStruct
panel.
Figure 4. 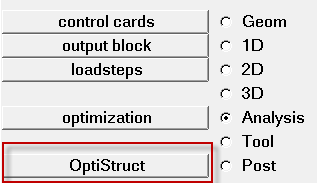
- Click save as.
- In the Save As dialog, specify the location to write the OptiStruct model file and enter Speaker_RADSND.fem for the filename.
-
Click Save.
The input file field displays the filename and location specified in the Save As dialog.
- Set the export options toggle to all.
- Set the run options toggle to analysis.
- Set the memory options toggle to memory default.
-
Click OptiStruct to submit the job.
If the job is successful, new results files will be in the directory where the Speaker_RADSND.out file was written. The Speaker_RADSND.out file is a good place to look for error messages that could help debug the input deck if any errors are present.The default files written to the directory are:
- Speaker_RADSND.html
- HTML report of the analysis, providing a summary of the problem formulation and the analysis results.
- Speaker_RADSND.out
- ASCII based output file of the model check run before the simulation begins; gives a nonlinear iteration history as well as basic information on the results of the run.
- Speaker_RADSND.h3d
- HyperView compressed binary results file.
- Speaker_RADSND.stat
- Summary, providing CPU information for each step during the analysis process.
View the Results
- After receiving the message "Process completed successfully" in the command window, click HyperView.
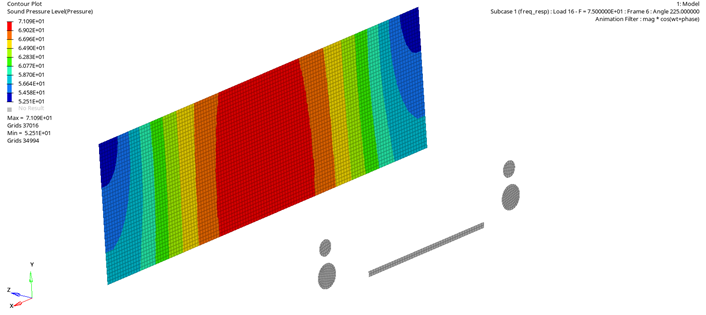
- Open the results and plot the sound pressure level at 75hz frequency.
-
On the toolbar, click
 (Contour).
-
Under Result type, from the second drop-down menu, select Sound
Pressure Level and select receiver for
components.
Figure 5. 